1. Whisk together 3 eggs per person plus a tablespoon of milk and teaspoon of water (also per person, so 2 people = 6 eggs, 2 tbsp milk, 2 tsp water. Add a pinch of salt.
2. Heat a non-stick pan and melt a pat of butter until it’s lightly bubbling.
3. Pour in eggs and use a spatula to immediately scrape the eggs that have stuck to the bottom. This happens almost instantly, if it hasn’t happened, your pan is not warm enough (turn it up.)
4. Use X’s and O’s to slowly keep gathering up the eggs that stick to the bottom – dragging the spatula across the pan from side to side (X) and around the perimeter (O).
5. When you have a few ‘piles’ of under cooked fluffy eggs, turn heat down to low.
6. Gently flip over piles so that undercooked surfaces get some heat, but not too much. At this point, the eggs almost cook themselves.
7. When no runny spots remain, season with finishing salt [and pepper if you like] and serve.
The eggs should look like miniature clouds and should be able to jiggle like jello. Now, I know scrambled eggs are not finger food generally, but when they turn out like cupcakes, why not?
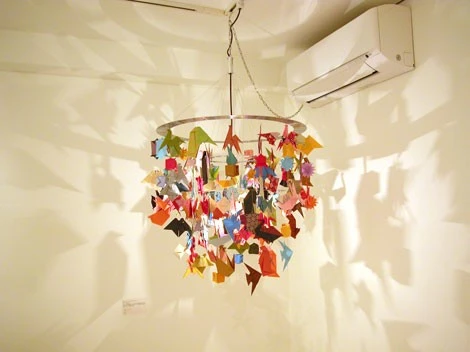
I started this quest with an interest in making an origami mobile for my baby’s room, but … that’s just not gonna happen. So for you artsy craftsy types…. here’s some inspiration:
This Origami mobile is beautiful. I’d say it’s THE DON of origami mobiles, and trust me… I’ve googled long and hard.
The one pictured above is a mix of shapes and animals, from fish to cranes to pointy balls, and it was the first to inspire me.
The butterfly punchout is available at giant art stores (Michael’s in Canada) or on Amazon here. I found the size a bit smaller than I would have liked (so check it to make sure it suits you). You can also get the non-monarch butterfly which has no holes and would look more like this (below):
Full tutorial for this one is available here (by its creator Carina Gardner)
When I took the first bite of this wrap, I knew I had to share it on the site, and also document it so that I could make it again. It was so damn delicious.
And I didn’t have high hopes for dinner tonight, to tell you the truth! We’re in the middle of moving. I was packing all day. The fridge is empty. I had defrosted some chicken breasts [thank god] so I had something to work with.
I have also been trying to eat paleo-style (no carbs, pretty much) because everyone eating this way seems to have lost that ‘last five pounds’ and then some. No carbs. Whatsoever. Ok. Whatever it takes!
So my challenge tonight was to be both carbless, fast, and work with very little in the fridge.
Well whaddya know, it ended up being the most delicious thing we’ve had in weeks. For the kiddo-version, I also called upon some leftover rice and lentils from the day before, because el toddler is not carb-free whatsoever.
Here’s a picture of the grown up version, and yes, that’s a sauce of sriracha mayo, which is – I have decided – the best thing you could ever mix in your kitchen since tartar sauce.
Recipe (and toddler version and pic follows) – unless your kid likes lettuce/celery/sriracha:
Lettuce wrapped chicken stir fry. With Sriracha Mayo. Yum.
Olive oil
Sunflower Oil
1 head iceberg lettuce (Organic preferred but not always available)
3 sticks celery (diced)
1 cooking onion (diced)
6 mushrooms (sliced) (your choice of kind. We had sliced white in the fridge)
1 small knob of ginger, grated
1 handful (about 3) spring onions (diced)
1/4 cup toddler friendly vegetable like green peas or green beans (if applicable)
splash sesame oil
splash tamari
splash rice vinegar
3 breasts of chicken (2 will do, but I will make 3 next time. It’s that good.)
kosher salt
Recipe:
Prep: Once you’ve diced all the vegetables, prepare the lettuce by cutting the core off and separating and washing individual leaves. For your wraps, try to keep pieces bigger than your whole hand and keep in mind (as Jason reminded me, smartly) that this isn’t an oily taco shell or carby tortilla, it’s just a piece of lettuce, so go crazy, eat it 3 sheets thick.
1. Wash and trim the fat of chicken breasts. Dry completely and dice into dice sized cubes.
2. Place in a bowl to marinate. Cover in olive oil and a sprinkle of kosher or coarse sea salt.
3. Cover the bottom of your wok or favourite stir-fry pan in sunflower oil and bring to medium/high heat
4. Add a piece of diced onion. Check that heat is hot enough to sizzle but not so hot it will burn. Add rest of onion. Reduce heat to medium/low.
5. When onions begin to brown, add mushroom. Allow them to soften and brown (3 min)
In the meantime, if you are doing a toddler version, begin warming up a small, sunflower oiled, toddler portion pan. Add a small portion of the browned onion and mushroom, and then add diced chicken and allow it to brown on medium heat, then flip over and reduce heat and add pre-cooked rice and green veg.
6. Add celery and diced chicken to wok/stir fry. Allow to brown on medium/high heat. When browned on one side, flip over and reduce to medium/low heat. Try to pile the onions and celery and mushrooms on top of it so that they stay crunchy and don’t overcook.
7. Add a splash of sesame oil, tamari/soy, and a splash of rice vinegar. Add grated ginger and spring onion.
8. Simmer on med/low until ready to eat (5 min). In the meantime, check toddler version for doneness of chicken and overall temperature.
9. Mix about 2 tbsp mayo with 1 tbsp Sriracha (or to taste)
10. Serve it up! I did a bowl for the lettuce wraps, a server spoon and bowl for the contents, and a little side bowl of sauce with a spoon. Worked great.
For the baby version, I just took some extra time to make sure it was cool enough, and cut the chicken a bit smaller. For what it’s worth, she ate the whole thing (all the while asking us for “ham” ?!?! She is obsessed with the idea of ‘ham’ – incidentally, it’s also Jason’s favourite food group. Anywho.)
Years ago, Jason and I started experimenting with lasagna recipes. We tried meat, we veggie, we tried all sorts of different things. What we stumbled upon was a lasagna so good that we still (years later) make it about once a month or so. We have it down to a science. Veggies. Spinach basil mix. Rice Noodles. Go.
That it happens to be vegetarian is strange, as we are not…
That it happens to be toddler friendly and gluten-free* is another bonus of the recipe – and one that we have definitely capitalized on since baby RZ was only six months old. It was her first ever real prepared ‘meal,’ and she adored it! I hope you will too. : )
Roasted Veggie Lasagna
The lasagna is made in a few separate steps. It might seem like a lot at first, but once you’ve made it twice the steps get very simple. Especially if you can make the roasted vegetables the day before.
Ingredients:
5 medium sized zucchini (or more as desired)
1 large eggplant (or more as desired)
1 package hard tofu, smashed by hand
2 balls of mozzarella, grated
1 container of ricotta
3 bulbs garlic, roughly chopped
1 big bunch or package of spinach or baby spinach, chopped
1 bunch basil, chopped
2 jars of spaghetti sauce (Prego works well)
*You can also have a layer of ground beef if you prefer that. We do this sometimes too.
Step 1. Preheat the oven to 400 degrees. Slice the zucchini and eggplant lengthwise, and then chop into iPod Shuffle sized pieces. Don’t they look like little iPods??
Toss in olive oil, sea salt, and italian herb seasoning. Lay these out on a roasting pan with at least the amount of spacing as shown, and cook for 7-10 minutes, then flip if translucent or remove from oven if soft and browned. If you see any burning, turn the temp down… if there’s no sizzle, turn it up.
Repeat with as many veggies as you have – it may take several batches. Place roasted veggies aside or refrigerate if making day before. Make sure you try a few samples, just to be sure they’re delicious. I almost always add a dash of tamari for some extra flavour. (If you are making this Gluten-free, buy the gluten free kind. Tamari is my fave.)
Step 2. This step can be done any time but it’s a tad messy. You’re going to prepare a big bowl full of chopped spinach, chopped basil, chopped garlic, ricotta and smashed (by hand) tofu. Add a dash of salt. I didn’t get a picture of my spinach mixture on its own but you’ll see it below in context.
Step 3: When you’re ready to build the lasagna (I recommend doing this the day after you’ve done steps one and two), the first thing to do is make the noodles. And pre-heat the oven to 375.
Bring a well-salted pot to a boil and add your noodles. We use (and love) the Rizopia brand brown rice sheets, shown below. It has the perfect hearty texture for lasagna.
The only rice pasta brand you’ll ever need.
Cook until done (about 11 minutes I think, but every stove is different. These noodles do like a rolling boil.) Once cooked, strain and run some cold water over them. Add a splash of olive oil as well. Then you’ll want to lay them out individually (quite quickly) on a cutting board or other non-stick surface so that they don’t stick together. *Some pieces will not make it out whole. Use those for your middle layers if possible.
Ready to start building a lasagna? Here’s mine in progress:
Step 4: Start the layering (almost done!). A really useful tool for this stage is a silicone baster, but a spoon will do. Coat your lasagna pan (preferably a heavy pan like a Creuset) with pasta sauce. Lay out three noodles or enough to cover the surface of the pan, and layer more sauce on top, as pictured. Then, add your spinach/ricotta/garlic/tofu mix. Layer #1 completed.
Next, lay more noodles on top of the spinach mix, coat with sauce, and then lay on the roasted veggies, about 2-3 vegetables thick. Then, add third and final noodle layer, and cover in sauce…. and cheese.
So it’s three layers pasta sheets and two layers filling, with sauce and cheese on top.
Step 5: Bake at 375 for 45 minutes or until golden brown. *Note, the more browned it gets, the more chewy the cheese top gets, which adults love but isn’t the best for the young ones. Aim for browned in spots but not all over.
Allow it to cool so that the juices settle and then carve up and dive in. Bon Appetit.
– 1 small bunch curly or flat kale (we used flat) or spinach – diced very finely. – Two eggs – 1 medium onion (diced small) – 1.5 cups cooked, cooled brown rice (can be done the day before if you want a 20 minute weeknight meal) – 2 cloves garlic (grated or pressed)
What to do:
1. Fry garlic and onion on medium heat in a heated, oiled, non-stick pan. Allow them to lightly brown.
2. Add 2 eggs into pan and scramble “in situ” – right there in the pan, all around the onions.
3. Add cooked, cooled brown rice (I got the cool part from chinese fried rice recipe – it helps with texture)
4. continue to mix together on medium to high heat until the rice is sizzling. Add a dash of tamari and a teaspoon of rice vinegar (or other favourite seasonings).
5. Add chopped greens to pan, mix all together, reduce heat and cover for 5 minutes.
Read more about my approach, and how I got here, below or skip down below to the food adventures:
> Food Adventure 1: Touch/Tactile – Exploring food with both hands…and face. > Food Adventure 2: Smell – Introducing Aromatics > Food Adventure 3: Sound – the thrill of snap, crackle, & crunch! > Food Adventure 5: Taste – Big adventures for little palettes > Food Adventure 5: Sight – the bright, bold, beautiful colours of food
I wouldn’t say it’s a radical departure from either of the approaches above, but it’s definitely an in-between, plus adds some additional elements that I haven’t seen enough of; like the importance of incorporating sense exploration. ← Research is pointing out the importance of this more and more, as you’ll see below.
On the scale of puree to BLW, I’m definitely way more on the BLW side, I absolutely love the food exploring, the hands-on style, the self-regulating, the adventurous spirit of it. But I found it to be a bit too grown up at times… and I found myself (still now) making finger food more accessible in various ways. Mostly by making them more bite size, sometimes mashing.
I suspect there are more parents like me who are doing BLW this ‘softcore’ way; supplementing major food exploration with more manageable hands-on meals. BLW foods don’t always have to be big and tricky, do they? Yet somehow I felt like rice and tiny cut up veggies was cheating?
This is why I wanted to share the approach we took, and put it out there for others that might be feeling like I was; that I needed something in between. Don’t be fooled by the spoon below – the spoon feeding only lasted about a month or less, but yes, that’s how we started….
Avocado mash (above) at 6 months, corn on the cob (below) at 12 months.
So. Where does this leave us?
The best way to describe what we did is what I’m calling THE 5 SENSES METHOD.
What’s it about? Quite simply, the great human adventure of starting to eat and appreciate food; and how the awareness of taste, smell, sound, sight, and touch is key to that.
Practically speaking, this method is about serving 80% of meals as bite size finger foods made from grains, meats, and vegetables. Choosing (or designing) meals that are colourful, interesting, and aromatic but still unprocessed, nutritionally dense, and in most cases ‘whole’ like a grain of rice or a piece of fruit. The other 20% of the time; having fun with texturally challenging, ‘bigger’ whole foods, and helping baby learn how to manage the little obstacles that come with eating grown-up sized table food. Independent eating, yes – all the way. But also simple and gentle, with an appreciation for flavour variety, shape, aroma, & texture.
Mango sticky rice at 9 months above, veggie dinner at 10 mos.
Veggie Dinner at 10 mos.
Recent research has shown that everything from colour and shape to what music playing in the background affects our perception of flavour. The more I’ve thought about this, the more I’ve realized that what really doesn’t come across in either puree or BLWing is how important it is for babies and toddlers to be stimulated by and interested in what we’re feeding them. But also, how important it is that we share in their flavour experience, and delight in the food we’re providing as much as we want them to delight in eating it.
Putting this all in the context of the 5 senses helps it all come together, so here it is:
Food Adventure 1: Touch/Tactile – Exploring food with both hands…and face.
BLW does the best job of introducing this concept; letting the baby explore food freely, and feed themselves. The part of this that I’ve really found great value in is how babies take so easily to the concept of a “whole” food — I was amazed to see my daughter navigate whole fruits, eggs… even a chicken drumstick at nine months old. While I don’t think this type of eating is necessarily practical for every meal, it’s really important to experiment with soft textured whole foods. Smaller ‘whole’ foods like brown rice and well-steamed broccoli were absolute staples.
Examples to try: partly peeled bananas, whole tomatoes, and peeled oranges (acidic foods only weekly though, not daily). Avocado,ends of bread. Colourful, messy, tactile foods like Lasagna and Spaghetti with prima vera sauce, mango sticky rice, dried fruit, large piece of baguette to gnaw on, burgers/slider patties.
I love the way my friends did this with their baby; they’d have their son in the bouncy chair while they cooked, and would let him smell the basil, mint and whatever other fresh ingredients they were chopping as they cooked. Did that baby grow up to eat everything? Yup. And we did the same thing for just that reason. (And it worked out pretty well for us too).
Aromatic examples to try: Italian-herb pesto pasta and sauce, indian food, watermelon salad, smell/taste exploration with mint, basil, and other delicate herbs.
> Food Adventure 3: Sound – the thrill of snap, crackle, & crunch!
There’s growing evidence for the idea that sound affects taste, including the concept that we derive direct enjoyment from the crackle of a Rice Krispie or the crunch of crudités.
Crispy Examples: steamed peas, raw or light poached apple and pears, mum mum crackers or other melt-in-your-mouth crackers, wheat puffs, baked veggie patties
*Also, play music at meal time… not kid music … real, enjoyable music that’s fun and will make you smile. It’s infectious, and creates that important association between smiles, fun and eating.
> Food Adventure 4: Taste – Big adventures for little palettes
The simplest of all. But maybe not so simple, now that research is proving how powerfully other circumstances influence it. The best example I have of a culture that does taste adventure well is the French — who entrust their youngsters with leek soup and baguettes practically from birth.
Big credit to my husband, the true epicure, who has always been a master of flavour and definitely brave when it came to letting our daughter explore tastes. I’m so glad he did – I think that his natural passion for new things and sharing flavor adventures has been a wonderful influence on RZ, who does eat almost anything.
Flavour-experience foods: baby-green fried rice, miso soup, jambalaya, pesto pasta with chicken.
What I like about this style of eating is that it’s such a good introduction to how we eat, ideally, as adults; taking pleasure in the different elements of food and flavour, appreciating the way food looks on a plate, and taking great enjoyment out of a hearty slurp, bite, or crunch.
> Food Adventure 5: Sight – the bright, bold, beautiful colours of food
For adults, it’s about a pop of green or red, a beautiful browned crispy edge, or the bright hues of fresh veggies and citrus. The natural joy of enjoying food with our eyes is something we carry with us for life. For babies and toddlers, we need to pass on the knowledge that food is a delicate art that time and effort goes into. It’s not about spending an hour in the kitchen working on the presentation of the babies food, but it could be taking an extra 10 minutes or so to consider how a meal can an an extra bit of twinkle to those big, beautiful, eyes and curious baby faces….
By the age of 2, you’ll be hearing words “hair”, “eyes”, “green”, “smile”… “happy”… food can help bring the world of shapes and colours and names of things to life.
What do you think? As always, I’d love to hear your thoughts.
I first came upon Maryann Jacobsen’s personal blog Raise Healthy Eaters through searching out healthy recipes for little ones. What I found was an author, dietician, mom, and blogger whose philosophies were very close to my own when it came to feeding toddlers. Her book, Fearless Feeding encourages us to feed ‘the whole child’ (awww… love that) and is definitely worth checking out, especially for the tips on meal planning and meeting the challenges of getting healthy food on the table.
Problems with feeding usually occur when parents take over the child’s job (controlling their eating) or when children take over their parents job (want to graze and call the shots on what is for meals). It really simplifies feeding!
Fearless Feeding by Jill Castle and Maryann Jacobsen (picture c/o Laura of Orgjunkie.com)
Since spotting her and subsequently speaking with her over email, she’s been caught-up in a bit of a media whirlwind about the idea of ‘cleaning the plate’ – another philosophy of hers that I agree with completely – that kids should not be made to eat everything of their plates, nor eat certain things on their plate ‘first’. You can read her “controversial” NY Times article here. It seems that the ol’ ‘eat everything on your plate’ adage is a classic that some might find hard to part with.
The idea of Division of Responsibility of Feeding is the backbone of her philosophy, and definitely applies to mine too. The idea is that the parent is responsible for what is served, and the child (or infant) is responsible for how much is eaten. Maybe this idea is new… maybe it’s just becoming well-known, but I think enough people have issues with weight these days that encouraging a little one’s own internal ‘stop’ mechanism is actually a really, really good thing.
On Self-regulation – why is it important for toddlers to decide for themselves when they’ve had enough and what they feel like eating? Or even if they eat?
The Ellyn Satter Division of Responsibility gives parents and child two different jobs. The parents job is to decide what is offered, when and where. Once the food is served, the parents is done and the child gets to decide how much and what to eat from what is offered. This is important because it teaches children to listen to feelings of hunger and fullness and it gives them some control. If they don’t want the meal, they don’t have to eat it.
Problems with feeding usually occur when parents take over the child’s job (controlling their eating) or when children take over their parents job (want to graze and call the shots on what is for meals). It really simplifies feeding!
Can parents influence attitudes to food with their own attitude? I wonder if our food enthusiasm has been ‘passed on’ or if that matters?
I actually used to be one of those parents who hated cooking and it created a certain mood around mealtime that was less than enthusiastic. Now that I like cooking more and have found a groove that works for me, it has helped my children get more excited about eating. I believe anyone who likes to eat can enjoy cooking and preparing food. The key is finding a way of doing it that fits personal preferences and lifestyles. This takes time and trial and error but is worth the effort. I’m still working on it!
How does your book address or enforce the right vs wrong way to encourage healthy eaters?
There really is no right or wrong way to raise healthy eaters. We include the latest research that shows parents how to increase the likelihood they will raise healthy eaters. I believe when parents learn why their child eats they way they do in terms of child development, they will better understand how to feed their child and why positive feeding practices work. This is what makes Fearless Feeding different, we help parents understand what to expect in terms of a child’s eating, so they can respond thoughtfully.
I finally have a short break in my hectic work schedule and the first thing I’m dying to do is post an update!
A little side note first….
In my first trimester, way back in 2011, one of my major food aversions was lettuce and other deep greens like kale, spinach, arugula, you name it… if it was green and leafy it grossed me out. And I was a real greens lover before being pregnant, so you can imagine what a shock it was to suddenly hate the thought of all that healthy food.
Well the bad news is… over two years later, I’m still so-so on greens. And it’s making healthy eating really tricky, because where I used to be able to steam some spinach, fry some rapini, or make an arugula salad… none of these appeal to me anymore. So I finally understand what it’s like to be a person who doesn’t like greens, and I get the fact that when you feel this way, the last thing in the world you want to eat is a whole forkful of the stuff.
Enter, my current most favorite toddler recipe creation….
Last week I decided this problem had to be solved… and the solution I created ended up being the most delicious, toddler friendly recipe EVER — my daughter ate it all up and loved it.
You MUST try it, it’s soooo yummy:
I’m calling it…..
BABY GREENFRIED RICE
Gather:
– 1 small bunch curly or flat kale (we used flat) or spinach – diced very finely. – Two eggs – 1 medium onion (diced small) – 1.5 cups cooked, cooled brown rice (can be done the day before if you want a 20 minute weeknight meal) – 2 cloves garlic (grated or pressed)
What to do:
1. Fry garlic and onion on medium heat in a heated, oiled, non-stick pan. Allow them to lightly brown.
2. Add 2 eggs into pan and scramble “in situ” – right there in the pan, all around the onions.
3. Add cooked, cooled brown rice (I got the cool part from chinese fried rice recipe – it helps with texture)
4. continue to mix together on medium to high heat until the rice is sizzling. Add a dash of tamari and a teaspoon of rice vinegar (or other favourite seasonings).
5. Add chopped greens to pan, mix all together, reduce heat and cover for 5 minutes.
Here’s the recipe for my mom’s chicken loaf, passed on from my grandmother who’s pretty darn militant about perfectly cooked moist chicken. It’s a great fall-back when you need something hearty in the fridge for a couple days. If you’ve been as short on time as I have in the past few months – it’s a lifesaver!
Gather:
1 lb ground chicken
1 egg
1 tbsp honey garlic sauce (V-H brand is delicious, but it’s definitely not at the top of the healthy list!)
1 tbsp cornflake crumbs (also amazing for chicken nuggets)
First Step: Whisk the egg.
Add 1 tbsp honey garlic sauce. Add 1 tbsp ground cornflake crumbs (per pound of Organic or Kosher ground chicken). Dash of salt. Mix all together. Place in a shallow pan and bake at 350 for 30* minutes.
*My mom makes it only about an inch and half thick, which allows the lower cooking time and the smooth texture throughout.
As I sit here, my daughter is devouring a kumato tomato, one of her (and my) favorites. I couldn’t help wondering, based on some of her eating habits, if maybe it’s partly genetic… partly learned… who is to say? Babies seem to come with their own sleep agendas, and food agendas. RZ has never been a ‘great’ sleeper, but when it comes to eating – she’s remarkable. Although I have been warned that the terrible two’s bring terribly picky habits.
Eat!
I guess it’s that whole autonomy thing. Once you know how to read a menu and ask for what you want, why settle for what’s served right? I wouldn’t trust a waiter who just brings me whatever he thinks I should eat… unless. …. he was a chef… who was hand-picking his special one-night-only choices…. You see what I’m getting at?
Perhaps… part of a child’s attitude toward food is based on how much they trust the restaurant? In any case, here are the habits of our a happy little eater (and for the time being, I have credibility!)
1. RITUAL
Just like the importance of night time ritual that so many parents rave about, we have a very distinct high chair ritual, and I believe that it has had a very positive and Pavlovian effect on RZ’s eating habits. Once she’s sitting in her chair, I put a dinner napkin on her lap (a dish towel. This evolved out of necessity, as a food catcher, not as a proper etiquette thing!), then a bib, then roll up her sleeves and put the high chair tray on. Then, if the plate’s ready, I’ll set it down with her spoon, or if it’s not and she starts whining, we say “patience…. 1, 2, 3, 4, 5” and that sort of works, for a minute. ; )
She has breakfast at 7, lunch at noon, and dinner at 5. We have barely ever wavered from this for many, many months. It’s not always easy but who knows – maybe it’s helped.
2. PLAY
The high chair is their sandbox. Anything goes.
I started giving RZ solids early, around 6 months (maybe sooner actually). This came with its challenges.
We still see a lot of mixing, sliding, spreading, emptying/pouring, sorting, mashing, spitting, splashing, relocating – and all is fair game. The only thing I’m strict with is dropping on the floor. Everything else is allowed… a complete mess, but allowed.
I hope this has perhaps encouraged her to associate food with fun… with freedom… with experimentation. All the things that we associate it with ourselves.
3. CONTROLLED VARIATION
Paediatricians advise parents to wait a few days before introducing new foods to infants. For some reason I was really uptight about that and kind of still am. So I’ll cook something on a Sunday, and she’ll have it for dinner and then lunch or dinner the next day. And maybe a third day if it’s something like pasta or something else that lasts.
All in all this ends up meaning that RZ will have the same meal 2 or three days in a row. And I think it’s helped in some ways, by giving her a sort of mastery over whatever is being served. She learned about the taste, the texture, the challenges, the best way to attack the plate, and by the third day (max) she’s probably super bored of it!
4. ADVENTURE
With parents that will eat anything and everything, and try to do just that, we’ve most definitely shared our enthusiasm for adventurous eating. I think that it’s led us to let her try things that might not be considered baby friendly. (Fois Gras at 7 months old…?!)
The thing is, I think she knows that the adventure is for all of us. When we all try something new together – it’s a shared experience, and she learns that we try new things just like she does. We say “ooh, ahh!” and our eyes light up – that’s behaviour she will likely mimic.
5. SELF-REGULATION
A few months ago, just before she turned one, RZ refused to eat much, for quite a few days. We thought she was hitting a picky phase, or just being difficult. Then one night that week she threw up. And within a few days….we ALL got the stomach flu.
Toddlers have reasons for not eating at certain times or certain foods. RZ has been through phases of liking just carbs, and other phases of liking just veggies.
Texture issues are valid. Preferences are valid. Accommodating them has brought us no trouble at all. I actually feel like her personal chef on most days.. but I’m kind of ok with that! (read: Dream job).
Respect for little tummies and little preferences is ok, I think.
6. CONSISTENCY
Breakfast at 7, Lunch at 12, Dinner at 5. We have rarely wavered. I’m not suggesting that this is a pre-requisite to healthy eating habits, but it does take some of the guess work and strain out of meal time. She eats in her high chair, 98% of the time. Which means no chasing her around the house to eat or wondering if her belly is full. Sometimes meals are in the car or out at friend’s houses – and to be honest, it’s not as easy. Wondering if your baby has a full tummy is kind of no fun.
The consistency is not completely altruistic ; ) But it has definitely trained her to have an appetite at all the right times.
7. GENETICS
I don’t know where I get my enthusiasm about food, but my daughter definitely has it already – whether by nature or nurture.
Where did it come from? Probably from us, her crazy food fanatical parents. Or my grandmother who is religious about flavour and cooking times (overcooked chicken will get you thrown out of the family), or my mom who has a psychic connection with vegetables. Maybe from my aunt who barely needs to stock her fridge because she’s at the farmer’s markets so often. Or my cousin, who’s a veggie farmer. Maybe from my husband, whose eyes will almost roll back in his head from a good piece of meat.
We’re surrounded by passion for food and I try to put that love and passion into every recipe…sometimes it works, sometimes it doesn’t (last week she hated my lasagna. I was crushed. She gobbled up brown rice that week instead… go figure.) Moral of the story is… our efforts have been in sharing our love of food. We don’t get offended when it’s not workin’ for her… but we do aim to please!
Happy cooking! Please let me know if you’ve found any great habits to your toddler’s happy eating! Maybe together we can win over the kids who still haven’t gotten the knack of loving all the world’s beautiful, tasty food : )